今月頭に、またもや海外通販でポチってしまった車高調が届きました!
novitec challenge corse coilover kit

ということでしたが、いくら探しても詳しい情報がどこにもありません。
なんとなく、中身はKW かなと思ってポチりました。
届いてみたら予想通り、KW V3でした!
説明書まで見ましたがnovitecの文字は1文字も見当たりません!!!(笑)

明日まで待てないので玄関で開封!
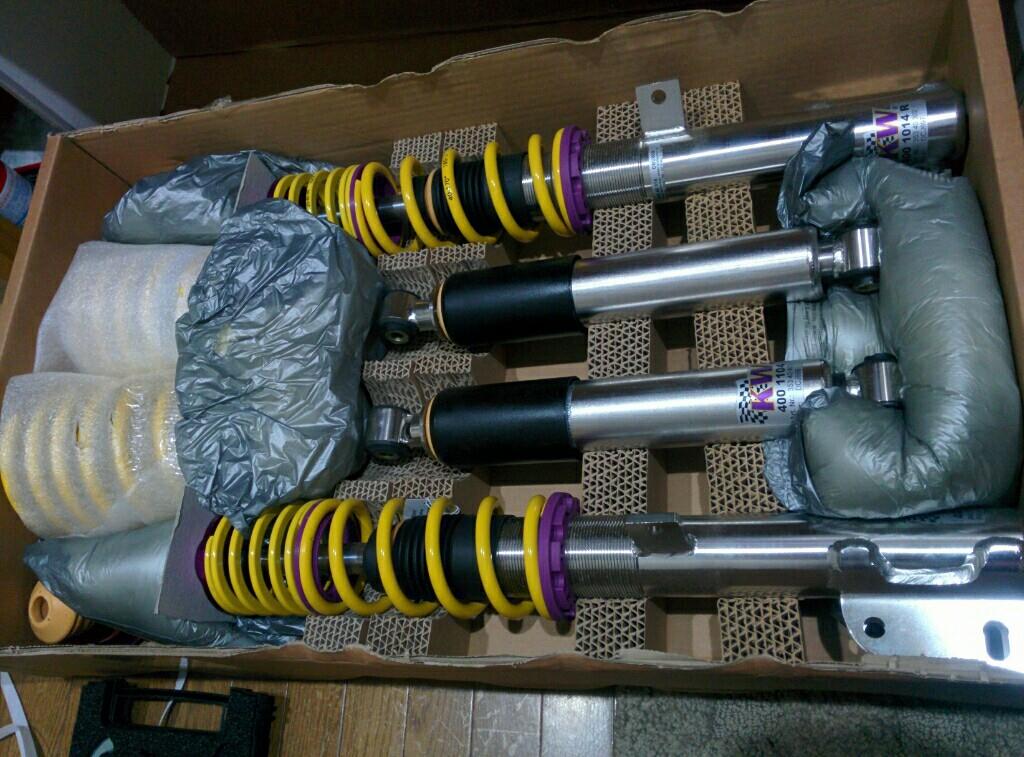
これはビルシュタインと同じかと思っていましたが、違いますね。
巻き数でいうと半巻き少ないです。
硬さは同じくらいかと思いますが(^^ゞ

縮み側減衰調整機能付きです!

こちらは伸び側減衰調整
紫のネジをあとからとりつけて調整するみたい。

なんと、長穴!キャンバーwwwww
これは知らなかったです!キャンバーつけよー!(笑)

純正より太い!リヤショックです。

これの減衰調整が、、、やりかた分からない(;><)
たぶんこれが縮み側減衰調整
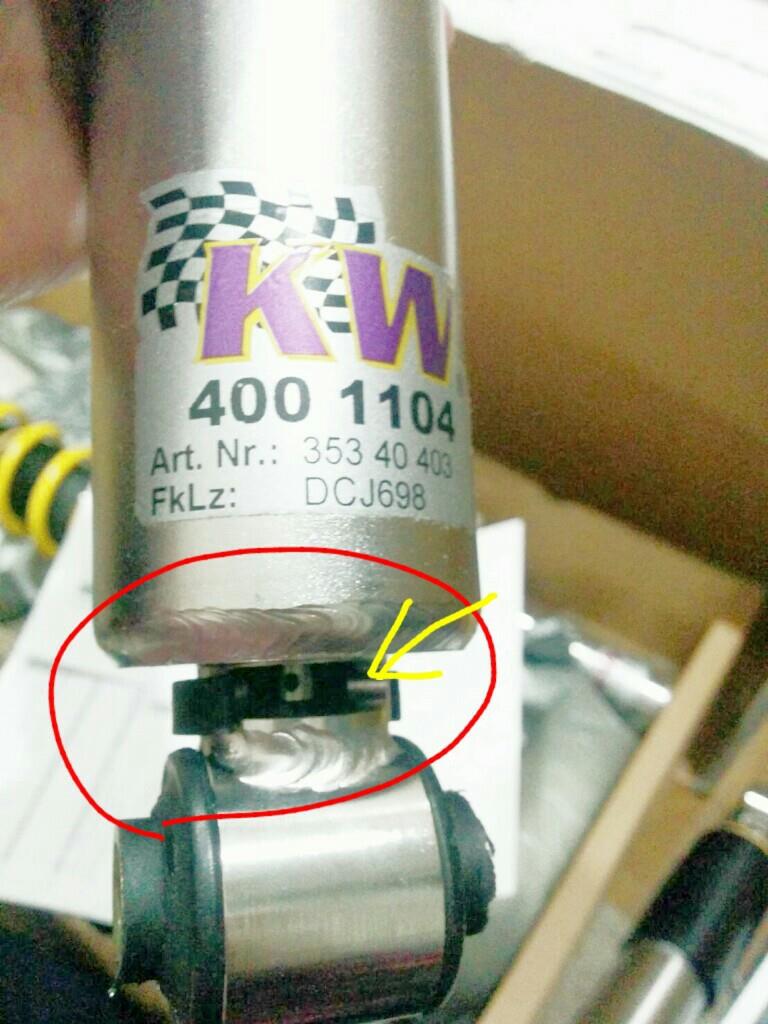
これがたぶん伸び側減衰調整
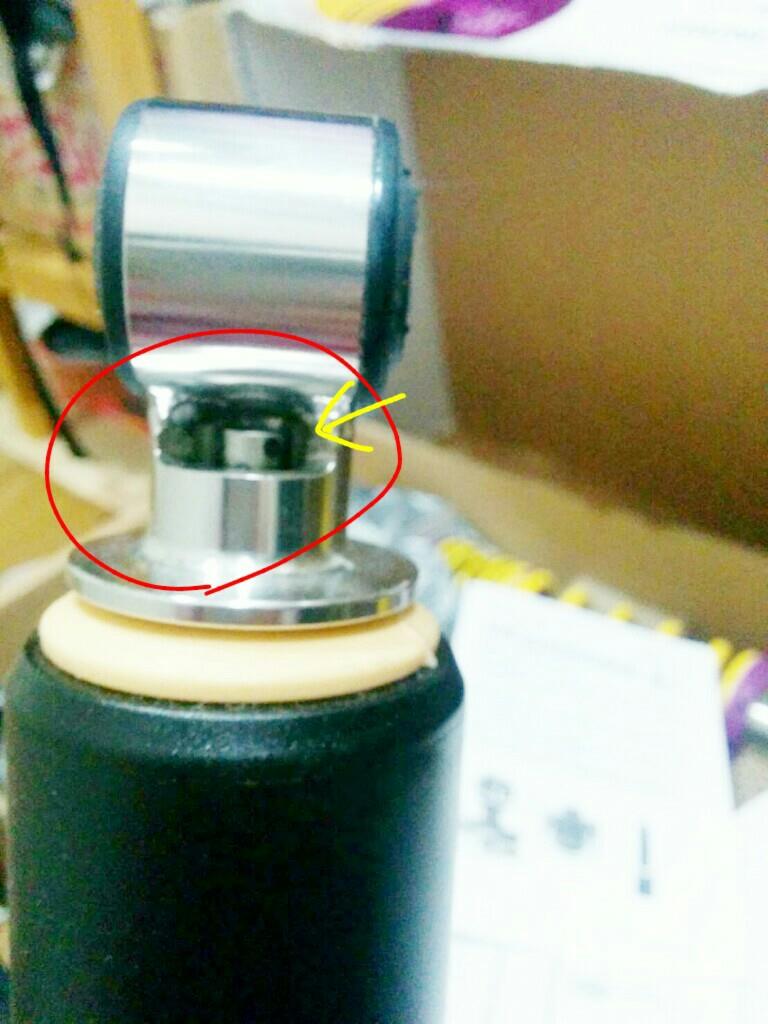
この小さい窓のなかにある穴に棒をつっこんで時計回り方向へ回すんでしょうが、
クリック感がないというか、、、(;><)
説明書

おうふ、、、英語だぜ!

と、言いますのも
いままで減衰調整付き車高調はクスコのスポーツゼロ2しか使ったことなくて、
これは1~5までの調整で数字が書いてあり、ぐるんぐるん調整ネジが回るものじゃなかったんです。
だから時計回りめいっぱい回したところから、何段もどし、ってよく聞くけどやったことなくて。
数字書いてないということは、記憶するかメモするしか術がなく、不安だし、
それに無限に回ったらもうどこに設定してあるかわからないですよねー(;><)
こわいけど、、、
やるしかないぜ!
と、言うことで今日これから取り付け(*^^*)

追記
説明書 を みながら打ってみました
Adjusting rebound:
The rebound adjustment is positioned in most cases at the end of the piston rod.(top of strut)
Please use the supplied KW adjustment wheel on the extruded tab adjuster for all adjustments.
1st step.
Place the KW adjuster on the adjustment Allen bolt.
2nd step.
Turn the adjuster clockwise to the right until it stops. This is now adjusted to full hard.
3rd step.
Turn the KW adjuster clockwise to soften the rebound setting to the desired level. The effective adjustment range is from 0 -16 clicks open.
Never drive the vehicle with the shock absorbers set to full hard or full soft!
Never apply force to the adjusting mechanism of the shock absorber.
As soon as you reach the end of the adjustment range, you will recognize a certain resistance.
Stop turning to avoid damage to the bottom valve.
Rebound adjusting principles:
In general a Soft rebound adjustment provides a comfortable ride at low vehicle speeds but the vehicle will have less stability at higher speeds, especially on the front axle. (vehicle will tend to float at higher speeds)
A hard rebound adjustment offers more stability but could reduce vehicle grip. (i.e. the vehicle will tend to skip across road imperfections, reducing traction)
Adjusting bump:
Bump forces, especially on low damper speeds, have a great influence on handling and driving behaviour of your car. The setting of the bump forces will be made form the bottom of the shock case.
Behind the adjusting grove you gain access to a pin with 4 holes.
With the supplied small key, the adjusting pin can be adjusted by 3 clicks in either direction.
Smaller increments are possible.
Before performing any adjustments, the value must be closed by turning the adjuster clockwise until it stops.
In this position, the shock will be at full hard, or maximum power.
From here, the adjustment range is 12 clicks.
Attention! Do not turn the adjusting spindle by force when you reach the end of the adjustment range, this may damage the fine valve inside the system!
Our recommendation for your car to start with:
■私は英語できないので、google 翻訳
リバウンドの調整:
リバウンド調整は、ピストンロッドの端部に、ほとんどの場合、配置されている。(支柱の頂部)
すべての調整のために押し出されたタブの調整に供給KW調整ホイールを使用してください。
第一段階。
調整六角ボルトにKW調整を配置します。
第二段階。
止まるまで右にアジャスターを時計回りに回します。これは、現在のハード完全に調整されます。
第三段階。
所望のレベルに設定リバウンドを柔らかくするためにKWアジャスターを時計回りに回します。効果的な調整範囲は0〜-16クリックからオープンしています。
フルハードまたはソフトfullに設定ショックアブソーバーで車両を運転しないでください!
ショックアブソーバーの調整機構に力を加えないでください。
すぐにあなたが調整範囲の終わりに達するように、一定の抵抗値を認識します。
ボトムバルブへの損傷を避けるために回し停止します。
原則を調整リバウンド:
一般的にはソフトリバウンド調整は、低車速で快適な乗り心地を提供しますが、車両は、特にフロントアクスルに、より高速でより少ない安定性を持つことになります。 (車両が高速で浮く傾向があります)
ハードリバウンド調整は、より安定性を提供していますが、車両のグリップを減らすことができます。 (すなわち、車両が牽引力を減少させる、道路不完全性を横断スキップする傾向があります)
バンプの調整:
特に低ダンパー速度に、力をバンプ、あなたの車の挙動を処理し、駆動に大きな影響を与えます。バンプ力の設定は、ショックケースの底形行われます。
調整木立の後ろに、あなたは4つの穴とピンへのアクセスを得ます。
付属の小さなキーを使用して、調整ピンがどちらの方向に3回のクリックによって調整することができます。
小さい増分が可能です。
任意の調整を行う前に、値が止まるまでアジャスターを時計回りに回して閉じなければなりません。
この位置では、ショックは完全ハード、または最大パワーになります。
ここから、調整範囲は12回のクリックです。
注意!あなたが調整範囲の最後に到達するとき、これはシステム内部の微細なバルブを損傷する恐れがあり力で調整スピンドルをオンにしないでください!
で開始するにはあなたの車のための私達の推薦:
 今日はルーフラッピングの予定でしたが、


 お昼頃から作業開始。


 今月頭に、またもや海外通販でポチってしまった車高調が届きました!


 日曜日、いわきオールジャンルモーターフェスに行って参りました。